This Adobe Photoshop tutorial will show you how to create blue text with a chrome background. For this tutorial I will be using Adobe Photoshop CS2. However, this effect can be achieved with most newer versions of Adobe Photoshop.
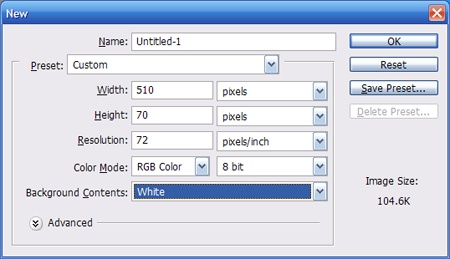
Start with a new image 510×70 pixels with a white background.
Using the text tool with Arial Bold 48pt crisp type the words “tutorials.bot”, or words of your choice.

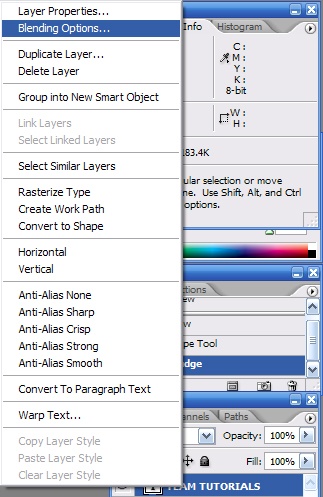
Now right click on the layer and select “Blending Options” to open the Layer Styles window.
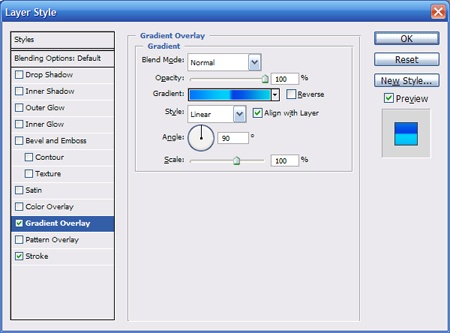
Apply the following settings:
Gradient overlay
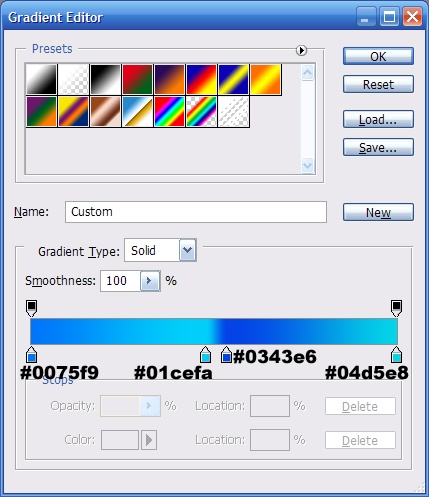
Here are the settings for the gradient (double click on the line to gradient line to open this window).
Stroke:
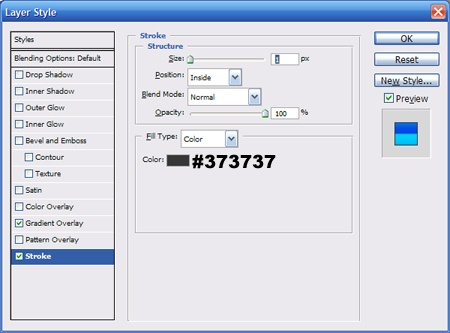
Apply the settings by clicking the ok button. Your images should now look like this.

Now ctrl + click on the layer in the layers window to select your text

On the Photoshop menu go to Select > Modify > Expand.
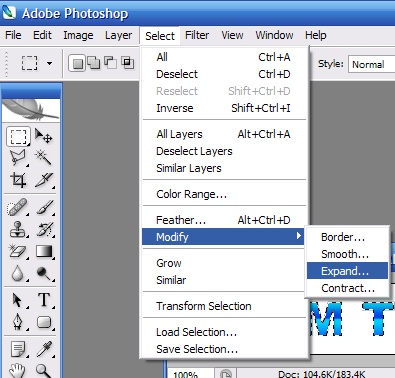
Expand the selection by 5 pixels.
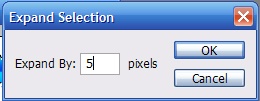
The selection should now look like this.

Now create a new layer and fill the selection with black.

Now apply the following blending options to the new layer,
Inner glow:
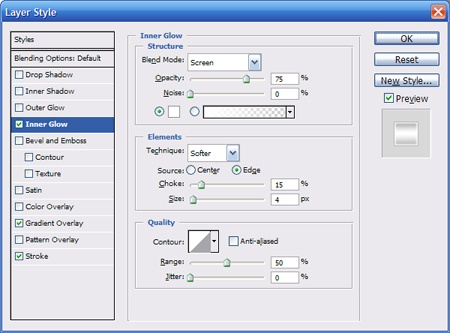
Gradient Overlay
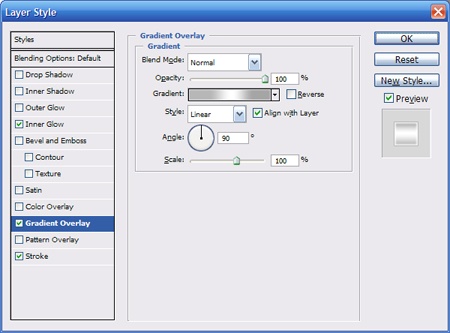
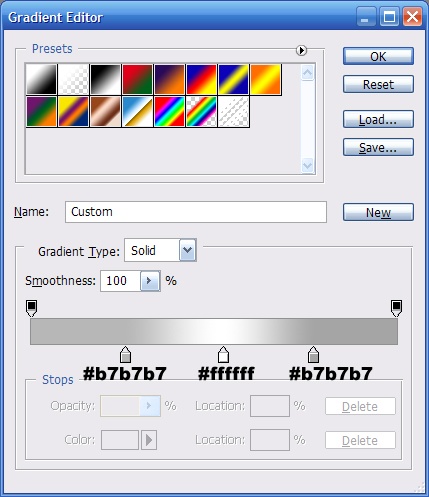
Stroke:
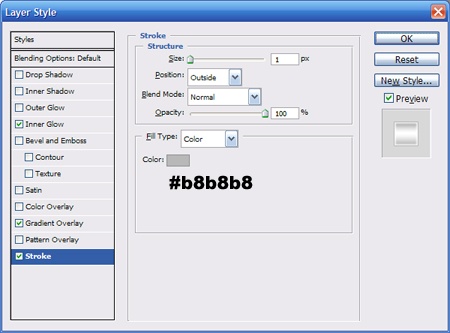
Apply the settings. You image should look like this.

Now drag the chrome layer below the text layer in the layer window.
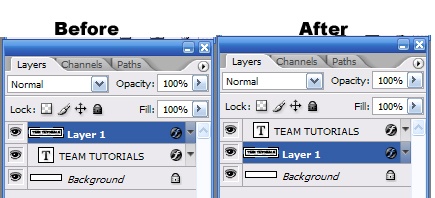
The final image should look like this.
