In this tutorial we will be looking at some of the more common, easy to use controls/functions of VB. We are going to create a simple form and update it using other information that is provided by the user. When making forms it is a good practice to name all of the controls and labels on the form in a manner in which you can remember. This will allow for easy debugging if something were to go wrong and/or needs to have a code change made. For example, I typically take the word that the command is like such as a button and turn it into a three letter acronym such as BTN. This way when scrolling through all of my objects I can automatically go to all of my buttons. Personally, I start all of my buttons with CMD as they generally “command” things to happen. So If I had a login form, everything would be named as shown below :
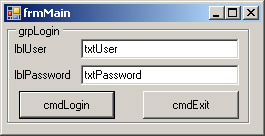
As you can see my Text Boxes are name txtXXXXX, my Form is name frmMain, my Buttons are named cmdXXXXX and my Labels are named lblXXXXX. This is not 100% necessary but it will make life easier once you start getting into hundreds and then thousands of lines of code.
To start, the screen shot below shows the properties windows when a button is selcted.
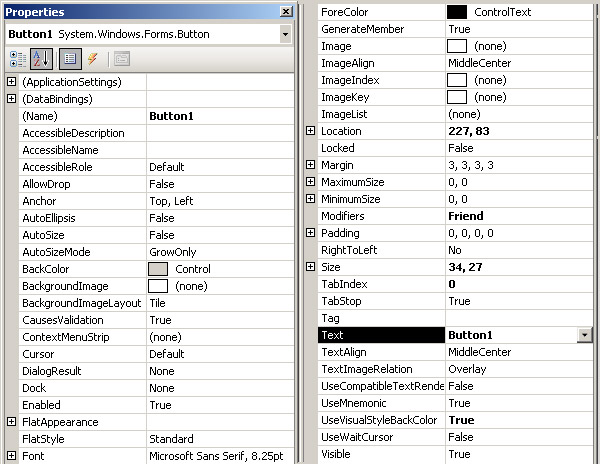
All of the things listed in the column above can be modified during run time. By this, I mean that the configuration of the button can be changed using code after a certain event happens, for example: by clicking on a button we can change the text of a label to the contents of a text box that we have on the form. To call these features, you type the name of the control (ex. cmdExit) and then a period and type the name of the property you want to change. This brings us to our first form that we are going to create. Create the form as shown below: (for the sake of the tutorial, I am making two pictures, one that uses the “text field” to show the name of all the items on the form so that you can name yours the same way so the code will work, and the second to show what that actual “text field” of the item is.)
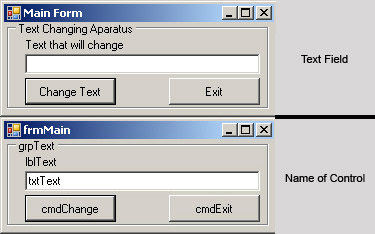
One you have everything named, we need to start adding our code. To start, double-click on the Exit button. It will automatically open your code viewer/editor and add the Sub Name and End Sub commands. Whatever you type between these fields will be run every time the exit button is clicked. The command for and Exit button is usually simple. Just type “End”. You should see this:
    Private Sub cmdExit_Click(ByVal sender As System.Object, ByVal e As System.EventArgs) Handles cmdExit.Click
        End
    End Sub
All this code does is kill the application if the Exit button is pressed. The end command kills the application and releases all system memory used to store the applications procedures. Next we need to add the code to the Change Text button to make the text of the label change to whatever text is in the text box provided. Double-click on the Change Text button for it to auto generate the opening code. Then type in the following code:
    Private Sub cmdChange_Click(ByVal sender As System.Object, ByVal e As System.EventArgs) Handles cmdChange.Click
        If txtText.Text <> "" Then
            lblText.Text = txtText.Text
            txtText.Text = ""
        Else
            MsgBox("The textbox is blank. Please enter text into it. Thank-you.", MsgBoxStyle.Information, "No Text")
        End If
    End Sub
Let’s break this code down a little bit to help understand what is going on. The first line:
If txtText.Text <> "" Then
Is setting up the “If, Then” statement. It says If the text in txtText is not equal to (<> means not equal to) “” (blank) then do the following (anytime you are using a string (actual text that will be displayed as it is) you need to enclose it in quotes):
lblText.Text = txtText.Text
txtText.Text = ""
These two lines are run on if the if statement is true. The first line is setting the label equal to whatever text is shown in the textbox. The second line is setting the textbox back to “” (blank). Then we have to tell it what to do incase the If statement is false. To do this we will need to use the else statement as shown below:
        Else
            MsgBox("The textbox is blank. Please enter text into it. Thank-you.", MsgBoxStyle.Information, "No Text")
        End If
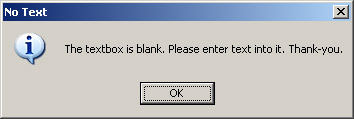
This code simple says that if the If statement is false, show a message box with the text “The textbox is blank. Please enter text into it. Thank-you.” , with the formatting of a System Information box, with the title of “ No Text”. This will alert the user that the textbox was empty and we don’t want to make the label blank. It also uses “End If” to tell the app that it is the end of the If statement. Now we should be able to test the application by pressing the “play” button. . Type “I want to change the text of the label to this!!” into the textbox:
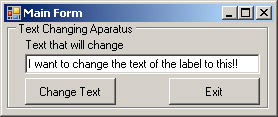
As soon as you hit the change text button the label should change to what we typed in and the textbox should become empty again as shown:
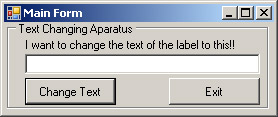
You should now be able to click on Change Text again to see our error message since the text box is empty.
Now if you click exit it should kill the application. You have now completed the first tutorial in the basic VB programming series. Please check back for more. Thank-you for viewing. Please comment if you have any question or recommendation of what you would like to see.