You should not use this code on a production website.
Warning: This tutorial uses old techniques. It is insecure and will leave your server vulnerable to SQL Injection attacks.This tutorials also uses mysql_ functions that are no longer support. For updated tutorials look for a PDO or MySQLi tutorial.This post will be delete or revised in the future.
This tutorial is a continuation on the “How to Access a MySQL Database Using PHP” tutorial that showed you how to setup a database using phpMyAdmin and how to read data from the database using PHP. In the tutorial I will show you how to write data to the database directly through a from on your website. This is going to be a very basic writing tutorial. We will get into more advanced stuff later on.
You will need to follow the first part of the the “How to Access a MySQL Database Using PHP” tutorial to setup the database and user permissions. After you do that you can continue with this tutorial.
At this point you should have the database setup with some test data in it. I am going to show you how to update the date by using a form on a website. First we will create the form. You can use any editor you would like. Sometimes I use notepad, but for this tutorial I will be using cPanel’s web base editor. It allows me to edit the files directly on my server and also color codes the lines nicely.
First we will create our form. We will name it “form.php”.

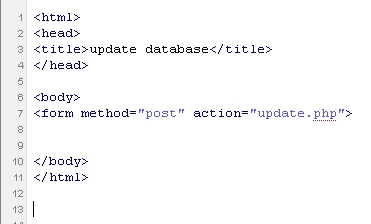
Now we will create the form using some basic html, nothing fancy. Start with the form tag. Notice that the form action is set to update.php, that is the script that will update the database.
Now we will add 3 input boxes for our 3 columns in the database. FName, LName, and PHON. There is a 4th column in the database we created, the ID field. That field is auto generated so we do not need to update it.
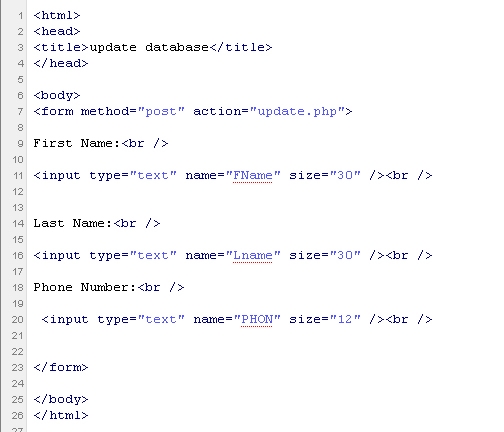
We created the input boxes for each field in the database. You will notice that the size of each input is limited to the size of our fields in the database. Each field is a text because we want a text box.
Next we need to add a submit button.
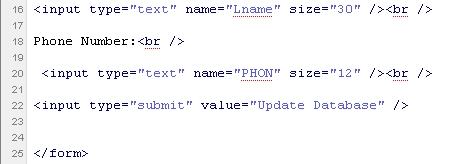
A submit button is also an input field. The type is submit, which will create a button and the value gives the button a label that you will see from your browser.
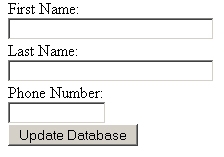
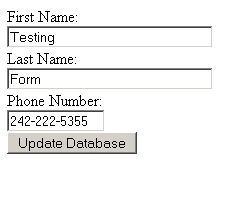
That is it for form.php. I might as well mention that there is no reason that I named this with a .php extension. It could have been called form.html and it would have functioned the same way because there is no php code on the form. Save the fiel and open it in your browser. It should look like this.
The next step is to create the update.php file. This file will update the database with the new information. Create a new file called update.php.

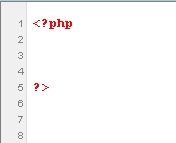
Now to start coding a php file we always start with the open and close php tags.
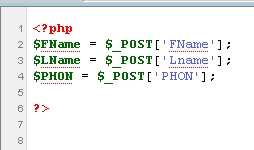
The first thing we are going to do is capture the data that was sent from the form.php file and store the info as variables. Because the form method was set to post, we can use the post variable function to collect the data. You will notice that the names in the post function will match the names we used on the form.
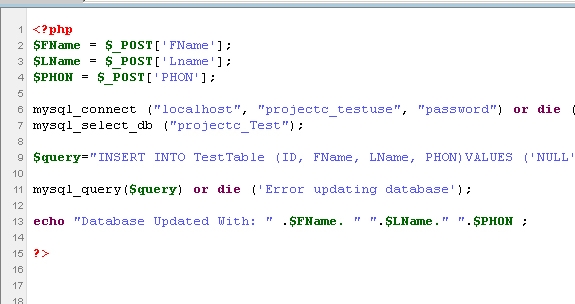
Now we will make a connection to the database. You will have to replace:
“localhost” with the location of your server
“projectc_testuse” with your username
“password” with your password
Then we are selecting the “projectc_Test” database you will change that to whatever you named the database in the first tutorial.

Next we are going to create the query that will insert a new row in the database. As you can see we are inserting in the table called TestTable and were are inserting the fields ID, FName, LName, and PHON. The actual values are coming from the variables. The ID fields is left NULL because it is auto generated by the database.

Now all we have to do is have the query execute. Then if the query fails we will print an error. If it is successful we will print the info that was added to the database.
Now you can test out the form.
When you submit the form you should see your results displayed.

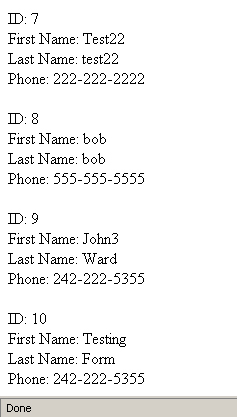
Now if you run the php file from part one of this tutorial you should see you updated info in displayed along with everything else that was in the database.
So that is a very basic way of writing to a MySQL database using PHP. Now you should be able to create a database, write data to the database, and read from the database. I hope to create some more advanced PHP/MySQL tutorials in the future.