experience using Microsoft Windows Vistaners some insight into TCP/IP settings. For this guide I will be using Microsoft Windows XP, but the version of the operating system you are using doesn’t really matter. If you are using a different version of Windows, you should be able to find the same settings that I talk about in the tutorial, but there may be a different way of getting to those settings.
Note: I haven’t had much experience using Microsoft Windows Vista yet, so I cannot go into detail on how to change these settings network settings in Windows Vista. I am sure there is a different (and possible more difficult) way to change the settings in Windows Vista than there is in the previous versions of Microsoft Windows.
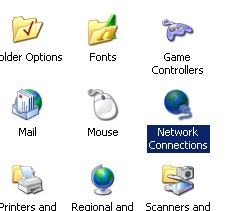
First we need to find the TCP/IP properties window. Open the control panel and click the “Network Connections” icon.
The Network connections window will open. All of your available network connections will be listed. I only have one network interface listed, which is my Local Area Network (LAN) card. You could have several options listed here both physical connections and virtual. For example if you had a wireless network car, and a wired network card, you would see both of these listed. An example of a virtual connection, meaning that there is no physical adapter, would be a Virtual Private Network (VPN). VPN’s are well beyond the scope of the tutorial, but I wanted to give you an example of the icons that you may see. My listing is pictured below.
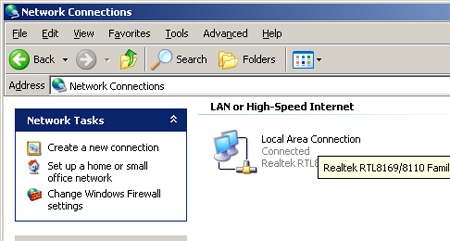
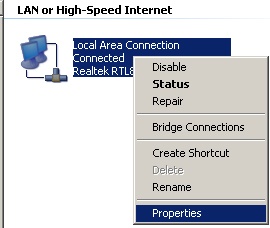
I will be explaining the settings of a standard wired connection. Right click on your Local Area Network connection and select properties.
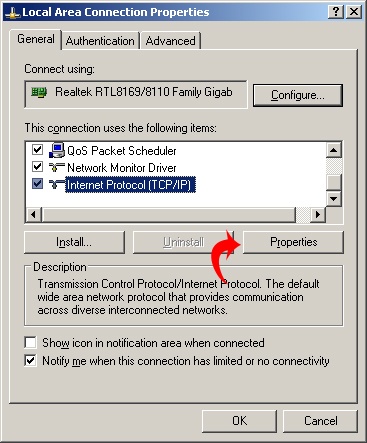
In the Local Area Connection Properties window find the box that reads “This connection uses the following items.” Use the scroll bar to locate the “Internet Properties (TCP/IP)” then highlight it and click the properties button.
You will see the Internet Protocol (TCP/IP) Properties window displayed. If you are using DHCP your window should look like the one below.
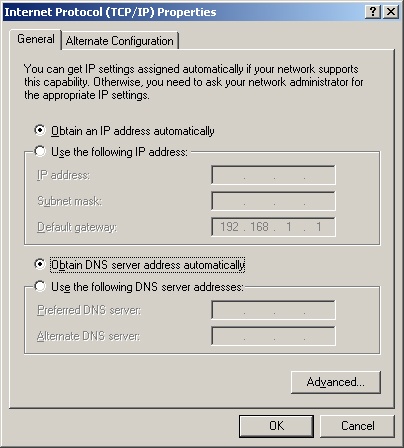
When the options “Obtain an IP address automatically” and “Obtain DNS server address automatically are selected, your computer will be set to operating using DHCP. DHCP stands for Dynamic Host Configuration Protocol. The basic idea behind DHCP is to have a DHCP server give each computer a unique IP Address. The IP address will expire at a set amount of time. When the address expires, the computer will try to renew the address with the server. If the address is not renew it can be assigned to another computer.
If you are using DHCP your computer could have a different IP Address every time you turn it on. DHCP is very useful for large network, and has saved many network administrators from having to manually set the IP address at each computer.
You can assign a static IP address, one that doesn’t change, to your computer. There are many reasons that you may want to set a static IP address. The main reason that I use static IP addresses is because I run servers on several of my PC. One PC runs Terminal Services so that I can Windows Remote Desktop Connection to connect into my PC from anywhere. Another computer operates as an FTP (File Transfer Protocol) server so that I can share files over the internet. I want these machines to have static IP addresses so I can identify them. It doesn’t do me any good to have a server running, but not know how to find it on the network.
If you wanted to set a static IP Address first you would select the option for “Use the Following IP Address”. You will notice that the DNS server option has changed as well.
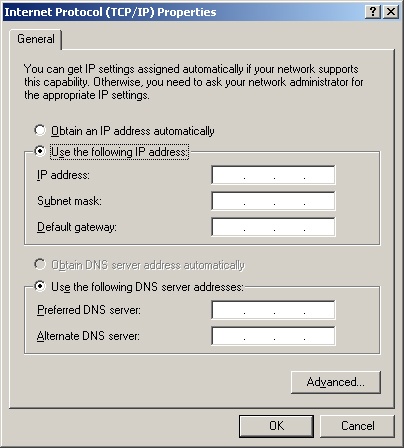
Now if you know what IP Address you are going to use, enter it in the box. You will want this to be a unique address. You will also want to make sure that the IP address that you choose is not going to be assign to a DHCP client if you have other machines on your network that operate on DHCP. Hint: Most home routers will allow you to set the range for DHCP, just make sure you use an address that is outside that range.
Enter the IP address in the box.
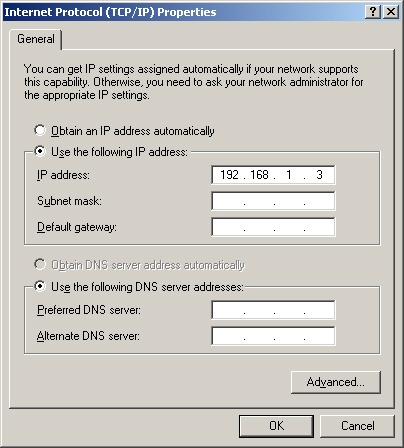
Now you will have to enter your subnet mask. In a nutshell, a subnet mask defines which part of the IP address is reserved for the host (to identify the network) and which part is reserved for the host (each computer). Subnetting can be difficult for some people to grasp so I will not really get into it. Most home networks will use a special class C IP address which is usually something like 192.168.1.X . The default subnet mask for a class C network is 255.255.255.0. To try to keep it brief that means that 192.168.1 will be the network and next number will be the host.
If you have entered your IP address, when you click on the subnet mask field, windows will automatically fill in the default subnet mask for the class of IP address that you entered in the IP field.
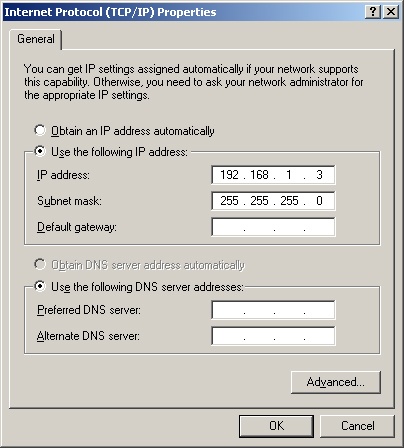
Now you will have to enter your default gateway. Think of the gateway as being on the edge of your network. It will regulate the flow of data between your network and the other network. In our home, the other network is usually the internet. On a home network, your default gateway will most likely be your router. The IP address of my Linksys router is the default of 192.168.1.1 so I will put it in. Other brands of routers may use a different IP address as the default (or you could have changed it), you may have to check the documentation.
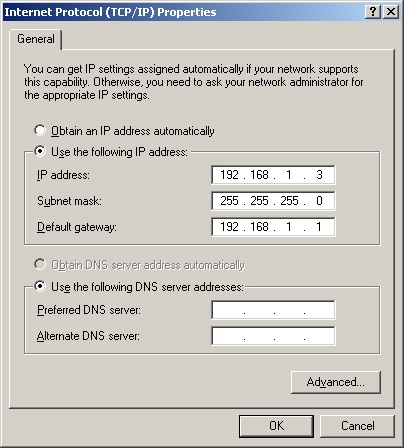
Now we will have to enter the DNS information. DNS stands for Domain Name System. A DNS Server will take a domain name like google.com and translate it into an IP address. Some people don’t realize that every web site we access on internet is actually an IP address. There is no way we could remember the IP address for every web site, so DNS was created to do the work behind the scenes for us.
You have the option to enter a Preferred and Alternate server. On my home network the router is also my DNS server so I will enter it as my preferred server. You do not have to enter an alternate but can if you know the IP address of the server you would like to use.
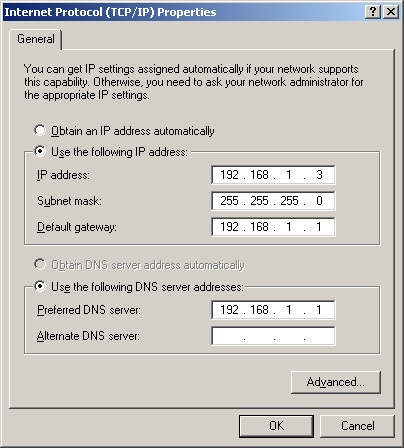
You can click ok to save your static IP address settings.
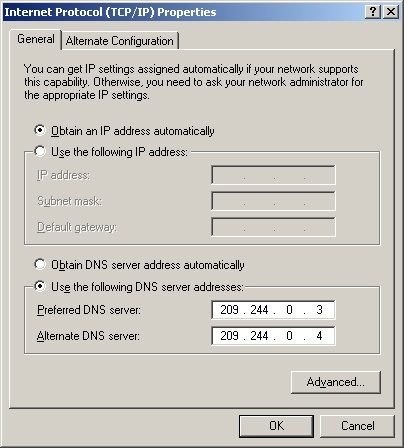
Now there are more advanced configurations that you can use. For example, if you want to use a DHCP IP address but want to use a different name server you can do that by clicking “Obtain IP Address Automatically” and then selecting “Use the following DNS server” and entering your DNS info.
If you click on the advanced button you can assign multiple IP addresses, default gateways, DNS servers and WINS servers. You can also adjust TCP/IP filtering and some more DNS options. Go ahead and explore the options, just remember how they were before you started.